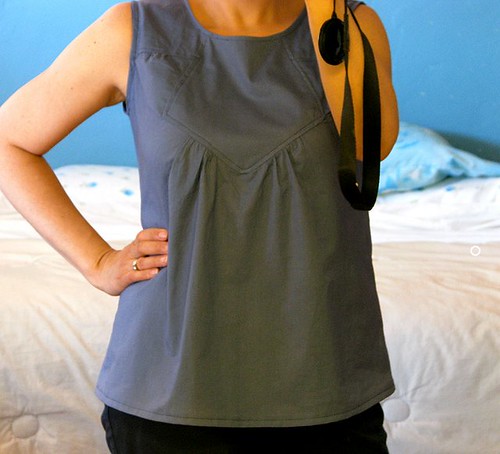
It’s so frustrating to work on something for so long and have it not work in the end. Well, maybe I am exaggerating a teeny, tiny bit. It is wearable. Just has some problems. Read on…
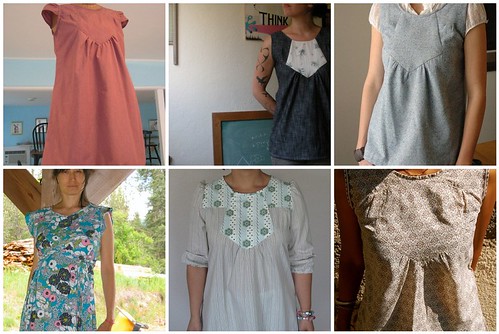
1. pink, 2. b&w, 3. grey, 4. floral, 5. stripes, 6. white&gray
This is simplicity pattern 3964, which I *love* and have been wanting to try for so long. I especially loved it after seeing it made so beautifully by all the talented sewers above. The very first one that I fell in love with was THIS ONE, but I couldn’t get it into my mosaic.
So here is what went wrong. First I made it way too big. I even took it in 1/2 inch on each side, which is better, but still not right (it just throws everything else off when you do that). You might not be able to tell how big it is, but trust me on this one.
Secondly, that ‘blippin” insert piece (the diamond shape piece) really was a booger to sew in without accidentally adding more unwanted creases and puckered up areas. I tried sewing this piece in THREE times. I thought I could iron it out. Finally I gave up. Oh, did I mention the gathered areas. Those are always a pain for me. Fortunately, I used very inexpensive fabric.
SO, despite all that, I want to try again. Am I crazy? You can only learn from your mistakes, right? Any pointers would be greatly appreciated.


Why not put this project in time out and give your brain a chance to work passively on the problem? You might find that with a couple weeks off, your subconscious will figure out what you need to do differently.
Check out my blog.. I had the same problem with the dress I made for the Make It! Wear It! Challenge.. the neckline was supposed to be gathered, and when I went to sew in the bias to finish the edges (I made it out of the same fabric as my dress- I ended up stretching out the gathering and had to take the front part of the dress out and start over with the gathering.
I ended up using elastic thread and that worked nicely. I just had to be careful not to stretch out the bias tape and make it all wonky again.
Just going from looking at your photo, this is what I would try. It is worth having a go because the top looks cute and once the wrinkle has gone you would wear it.
You could try unpicking the seam on the side of the front insert between the wrinkle and the seam that ‘crosses’ from the armhole to the insert.
The wrinkle looks as though it should ‘move’ up to the ‘cross’ seam and be incorporated into it. That cross seam may have to be unpicked to take in the wrinkle fabric.
Then the front insert can be sewn back down.
It’s hard to help without having the pattern. Did the instructions call for stay-stitching each piece? That helps it not stretch. Also using two rows of gathering threads. I divide each part into halfs, pin that down and then pull my threads. I take a big pin and run it back and forth across the gathers to even them out. Don’t know if that’s understandable but I hope it helps.
Hi,
I know this is an old post of yours, but I wanted to tell you not to give up on this type of yoke you have. What you have is opposing angles, so to get them to lay nicely you must stay stitch using a regular stitch a ‘hair’ inside the seam line of the inside square, making sure to pivot at the marked point. You will clip to this point and lay your yoke together. When you sew, the ‘clipped’ side should be facing you so you can pivot the needle exactly at that marked point. It looks like you’re sewing nothing when you get to that inside corner, but you do want to put the needle exactly at the clipped angle, pivot and continue. Definitely a lesson in manipulating fabric.
Practice on scraps, I used to always have puckers in these styles, but I was determined to get them right and now can not only do them well, now I recognize when I’m getting into trouble and actually know how to get out of the mess I got myself into. It’s all just practice :~)
-Jeanie