
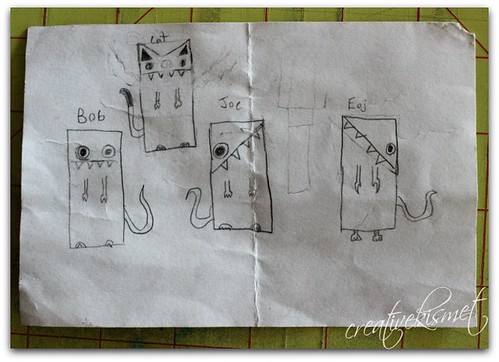
It all started with the little crumpled note card 1 year ago. Yea, 1 year! Ethan drew these and gave it to me after school and said, “Mom, you have to make these snack bags for us”. Of course, I was like, “Yes, I most certainly do!! They are awesome!”
But then nothing. As with many great ideas, it was put on the back burner. Mostly because couldn’t think of a suitable fabric to make these with. I didn’t want any plastic type of material, and regular organic cotton felt too flimsy (which I had made before and didn’t last very long and got super dirty and stained). Then I stumbled across beeswax fabric and knew I needed to try this out.
First I made some squares (see underneath the snack baggies) of organic linen and cotton muslin, just to test the process out. The linen felt too thick, but I may try making different (adult version) snack bags with those later. The thinner cotton muslin is great for using as bowl and food covers. I love them! I hope to make more in different sizes and work on using a lot less plastic wrap and baggies.
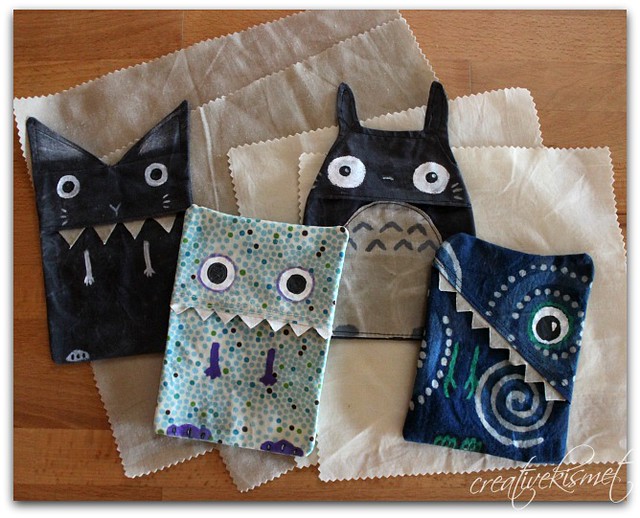
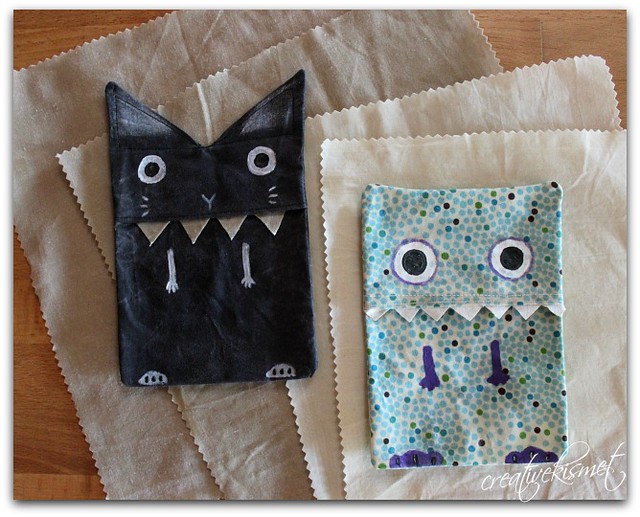
Once I got the process down, I got to work on creating snack bags with the beeswax fabric. You can see how the fabric looks a bit like old leather. They feel very durable and dry. I am excited to see how they work out with the kids (always the true test).
You can see how to make beeswax fabric food wraps –> HERE <–.
I did it a bit different, only because I really dislike turning the oven on in the summer.
First, heat the beeswax in a glass jar over a double boiler or in a mini hot plate, which is what I used. I got my beeswax from Mountain Rose Herbs. I bought 1 lb over 3 years ago and have used it for a hundred different things and still have 1/2 a bag left.
Then lay the fabric over a piece of foil and brush on a thin layer of beeswax with a natural bristled basting brush (which will now solely be used for beeswax applications). Then I zapped it with a heat gun to even out the beeswax. This worked out really well for me.
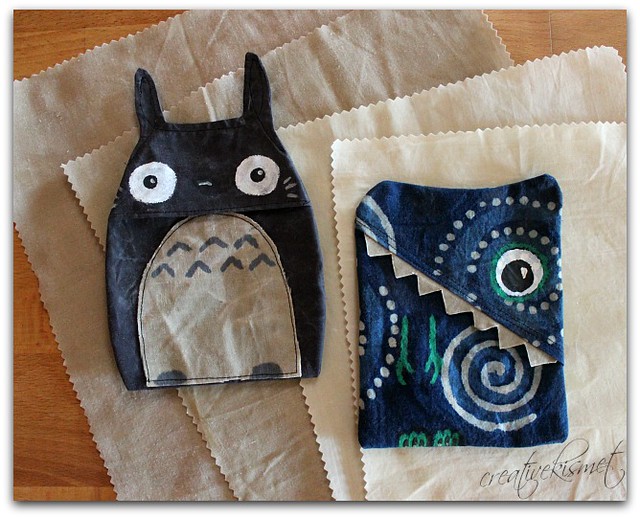
For the snack bags, I had to paint on the eyes, hands, feet with fabric paint. Once the paint was dry, I then coated the fabric with beeswax. this took a bit of planning, because I had to fold everything just right to get the correct placement of everything.
Then, I took everything to the sewing machine. The only problem with sewing beeswax fabric, is that the fabric wants to stick a bit and not move through the sewing machine. It’s not horrible, you just need to help it through every once in awhile.
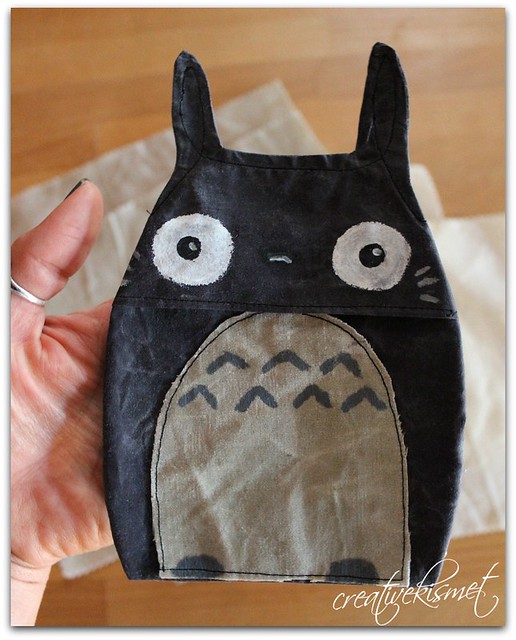
I got distracted halfway through and decided to make a Totoro snack baggie. I have a bad feeling they will be arguing over who gets to use that one…sigh… I think I may be needing to make another.


You are Da bomb!! my kids would have gone crazy over these…actually even they are all older they would still love them:)
Please let us know if you are going to sell these on etsy. I would love a couple of the toteros!
I would buy some also!
These are so cute! Totoro is absolutely my favorite character, you might have to send me a snack bag too! 😉 Or I guess I could buy some beeswax and make my own.
What are your thoughts on making the snack bag first and then coating it with beeswax?
I wondered this too. Does your sewing machine get gunked up trying to sew when the fabric is already waxed?