

I’ve been wanting to try making pendants using my own handmade images. I’ve had these little wood bits (circles and squares) that I’d been using for making clocks and decided to use them as the base. Here is what I did:
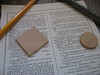

You’ll need paper (I used an old dictionary), wood bits from a craft store, waterproof micropen, pencil, scissors, craft glue, drill, small drill bit and clear glossy varnish.
1. Trace the wood piece on your selected paper.
2. Sketch out an image using a pencil, then trace/fill in with a waterproof micro pen. This will prevent the ink from smearing when the glue is applied.
3. When you are happy with your image, carefully cut out.
4. Decoupage image onto wood surface using thinned-out craft glue or modge podge. (I don’t like modge podge because it stinks). Allow to dry. Add watercolor wash at this time for a touch of color.
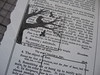
5. Very slowly and carefully, drill a hole with your smallest drill bit.
6. Apply a couple of layers of glossy varnish. Allow to dry overnight.
7. Use a jumpring to add to your favorite chain or beaded necklace.
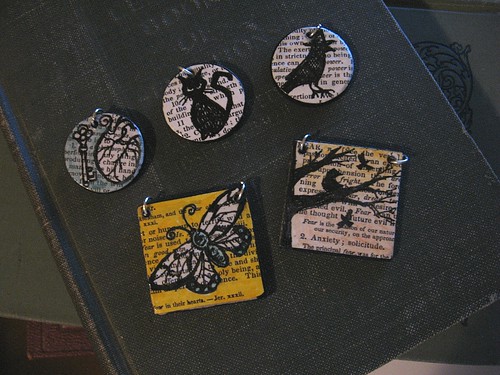
I made these on Thursday and they were smooth. Tonight (Friday) they are bubbled up giving them a bumpy texture. I’m not sure why this happened, but I think I kinda sorta like it.


Gorgeous pendants! My favorite is the square one with the tree and birds – it looks so moody. What a lovely idea. Thanks for sharing. Who would have thought it was that easy to make such lovely personal pendants (certainly not me ;o)
This might be just the right idea for some very personal christmas gifts.
You are amazing! I love these.
Regina those look great! My favorite is the birds in the tree! So amazing:)
oh no!! yet ANOTHER wonderful tutorial to add to my ever increasing “to make” list…when, oh when will i ever get to it? they look like a lot of fun to make. thanks for sharing 🙂
These are great – so easy to make into a unique gift for someone. I know another blogger that uses an old dictionary for some very cool projects… seen here, http://twostraightlines.typepad.com/two_straight_lines/2007/07/post.html
I think I might have to get one!
You are such a fabulous artist! I really dig the silhouette type illustrations, they make such a great impact.
Great Idea.
Thanks for the tutorial!
Pingback: Featured Blog: Creative Kismet « Feathered Fibers
Hi! These look cool! Love the bird and trees one!I have made alot of pendants using a 2 part liquid gloss. I don’t know if this is what you are using, but, when i use this the setting quality depends on the temperature (too cold and it sets funny)and also on how vigorously you mix it. Dunno if this helps at all!
Wow they are really amazing….Nice idea
Very nice and thank you for the inspiration! I’m going to try this out, except use a picture of my puppy.
great idea! and similar to the pendants I just started making – except I attach a bail instead of drilling. The drill scares me.
you can see them at http://busterandboo.etsy.com
:0)
Have to try this looks so fun to make thank you so much for sharing have to post your site so others will come here and take a look
hugs ginger
Pingback: Hand Drawn Halloween Pendant Tutorial · Jewelry Making @ CraftGossip
BEAUTIFUL! I can’t wait to make one! I’ll be linking to this as well.
I saw your handpainted canvas wallet on That’s Clever yesterday. I would love to try to make it but there is no template. Do you have a template that I can print? Thanks and love your work.
Just beautiful. Thanks for sharing. I will link in an upcoming blog post.
Nice idea to create unique pendants.
Anyone know which is a good site for unique pendants.
I am tired of wannabe unique pendants and personalized pendants like plastic unique pendants, with name written in gold writing etc.
I want some really unique pendants, personalized or otherwise, for my girlfriend, Can I also buy personalized pendants from you.
Pingback: jewelry boxes