
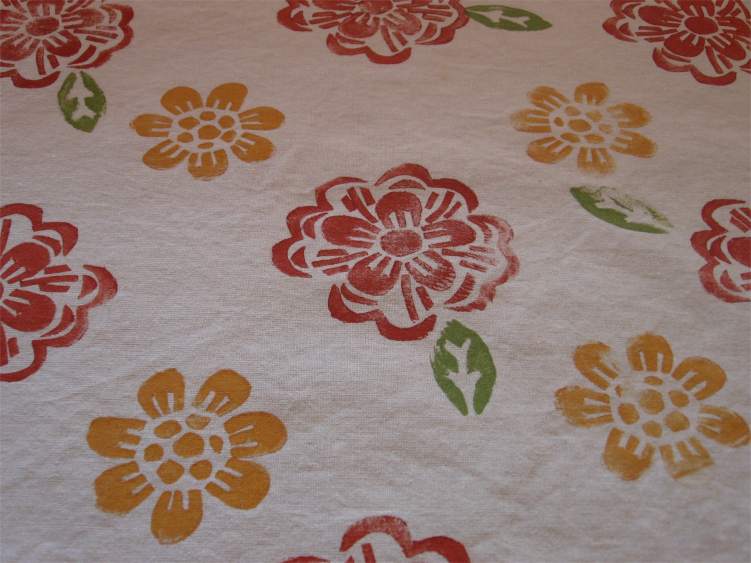
I made this fabric for Moki’s hand stamped fabric swap. We were to design a stamp (about 3 inches) and stamp a yard of nice cotton fabric, cut it into fat quarters and send 3 away (keeping one ). I couldn’t stop at one stamp-so I did three stamps.
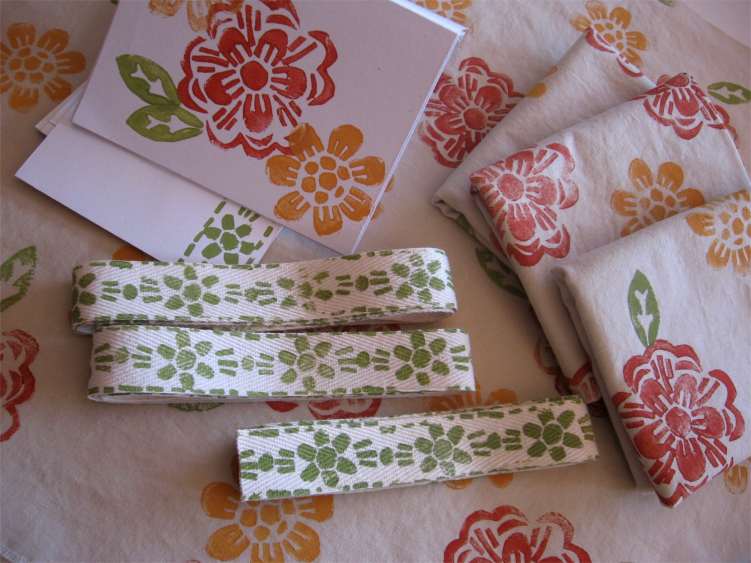
I did a flowery design using Fall inspired colors. Since I was all stampy, I made coordinating twill tape “ribbon” and notecards. Fun fun fun!
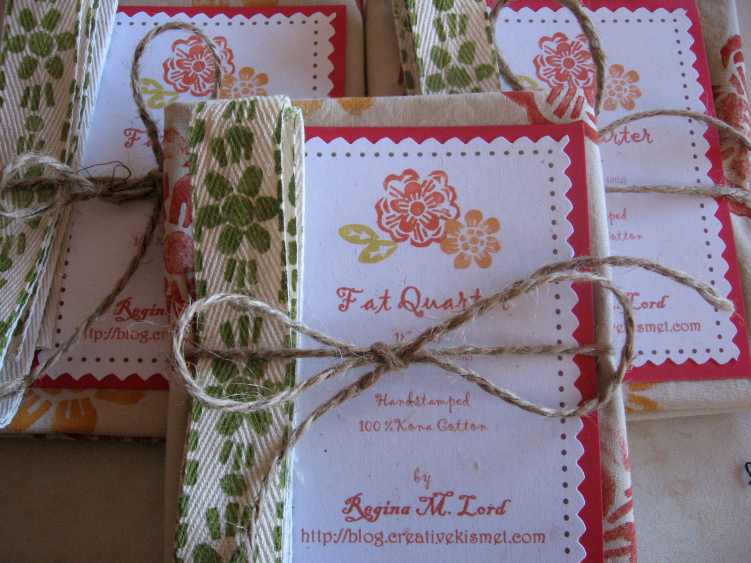
Then I packaged them up real pretty and sent them on their way.Here is how I did it: (Moki gives instructions too)
You’ll need: fabric of choice (pre-washed), 1 sheet of super thick craft foam, 1 sheet of thin self-adhesive craft foam, acryilic craft paints (you can use fabric paints/ink), exacto knife or very sharp scissors, a brayer and an iron for heat setting.
You can use a paint brush for applying the paint onto the stamp, but a brayer helps decrease the amount of excess paint that could potentially glop up your pretty/clean fabric. Plus, the thinner the layer of paint is, the better the outcome for a softer feeling fabric vs. a stiff painted feeling one(especially if you are using acrylic craft paints).
1) Cut out design using the thin self-adhesive craft foam. Peel off adhesive backing and stick onto a super thick piece of craft foam (see picture).
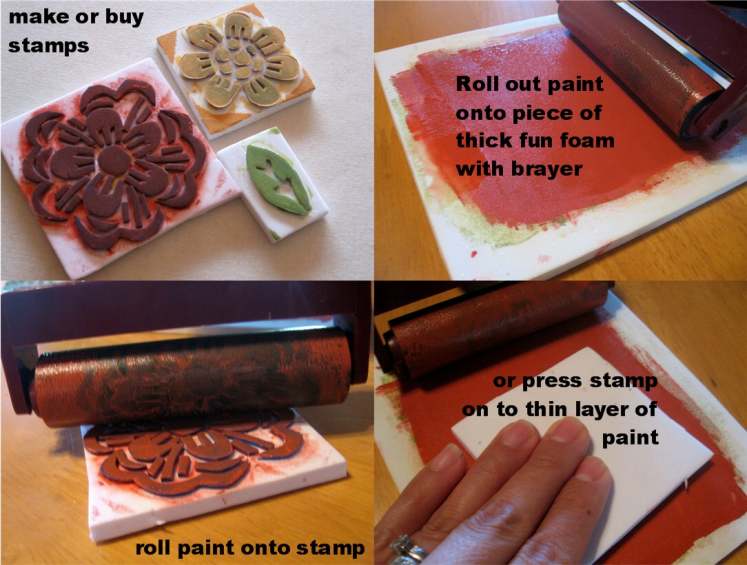
2) Spread out paint, using the brayer, onto a 6″ x 6″ (or larger) piece of super thick foam. This gives you a nice flat surface for an even, thin layer of paint.
3) You can either roll the paint onto the stamp using the brayer, or just press the stamp into the paint. I found that I got better coverage using the brayer, but smaller stamps are easier to just press into the paint.
4) Start stamping away, using even pressure when pressing the stamp onto the fabric.
5) When the fabric is covered with the design, allow to completely dry. Heat set with iron.
*I have not tried washing this fabric yet, but I do know that when I accidently get craft paint on my clothes- It NEVER comes off once it has dried.


Wow, wow again! Nice everything……stamps, fabric, cards, packaging, tutorial. WOW!
Super great job! Makes me wish I signed up for the swap.
So nice!
love it!!! i hope i get one:):) i am working on my fabric this weekend for the swap…i have everything and my design inspiration, just been short on time this week:)
i love this fabric! I always get so inspired, looking at your blog.
Spectacular results! Thanks for sharing the details on creating the stamps. I really do want to give this a go.
Yeah, oh yeah…I did get one! Thank you SO much! It is even more beautiful in person.
OMG…fabulous little packages! Those girls you swaped with will be soooooo happy 🙂 I know I would be!
Wow, that fabric is gorgeous! Great work!
Great tutorial. I received mine today from you. WOWWWW. Impressed and love it. Love the trim, the fabric and the card, thank you so much! I’m slack and have yet to do mine, I also got a little bit of performance anxiety LOL. But receiving yours has inspired me. Thanks!
what a treat to receive — it’s georgous! wonder what they’ll make with it?!
great tutorial ¡¡¡¡¡
Wow. This turned out beautifully. Thanks for the tutorial!
Thanks for sharing. The possibilities are endless! I have some ideas for our girl scout sleepovers. Hmmmm……
Oooo can’t wait to try this! Another item to go on my project list… but I may just bump it up to the top 😀 Yahoo!
thank you .
How cool. I have some stamps that I love and have been wondering what to do with them. Great ideas.
Great blog!!! do you know some eco or organic paints for fabric???
Pingback: photomaniacal.com » How to Hand Stamp Fabric
Pingback: Stamped Fabric « Made In Love
wow this is a GREAT site I am learning a bunch from you, I make my own greeting cards now I want some clay to make my own buttons
Thanks for a great tutorial..I have put a link to it on my freebies blog…hugs Khris
wow… this is a great idea. thanks.
im also gonna try this out….
I admire the valuable information you offer in your articles. I will bookmark your blog and have my children check up here often. I am quite sure they will learn lots of new stuff here than anybody else!
Very interesting article with great useful information. I am also sharing this article with my friends you have written excellent content. Thanks for sharing this kind of informative blog.
This information is very useful to me. Please share more information about this. Thankyou for sharing this information with us.