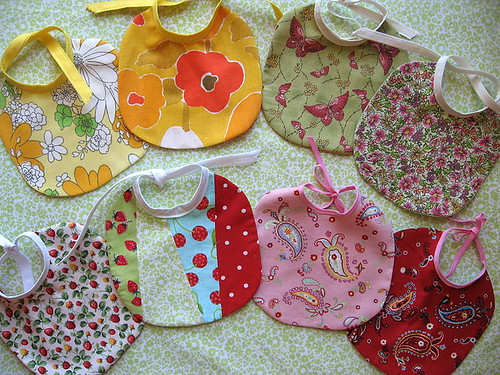
Seven of my good friends and family members are having babies! All due within the next 4 months! Five of them are having girls! This means I’ve got to get busy making gifts! I’m also in charge of games at a baby shower this weekend!!
So, I started making these bibs from THIS pattern. There is a pattern for two bigger sized bibs as well. I may make some of them too. I’m also planning on making a few sets of these really adorable cloth baby slippers(tutorial by Star Dust Shoes).
While I was setting up an assembly line for these bibs, I realized I didn’t have enough double-fold bias tape. I’d either have to go to the store to get more or use some single fold bias tape that I already had. I decied on the later, despite it being the more challenging choice. It wasn’t half bad and I actually like the result much more. Here’s how to do it:
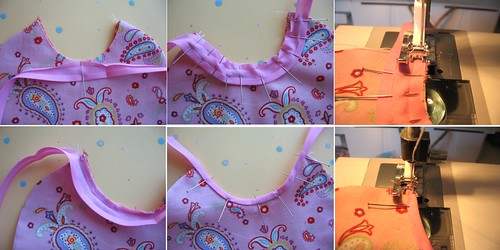
1. Align center of bias tape to center of bib neck. Pin cut edge of tape to edge of bib neck–right sides together.
2. Continue pinning around the neck. You may need to make small cuts in bias tape to make it curve around–careful not to cut past the first folded line.
3. Sew a straight stitch in between edge and first fold–about 1/8″ seam allowance.
4. Fold over the bias tape, turning under the free edge, to create a nice binded edging. Carefully pin in place.
5. Sew together, starting at the very beginning of bias tape, all the way to the other end. Hand sew instead of machine stitch for an even nicer finish.
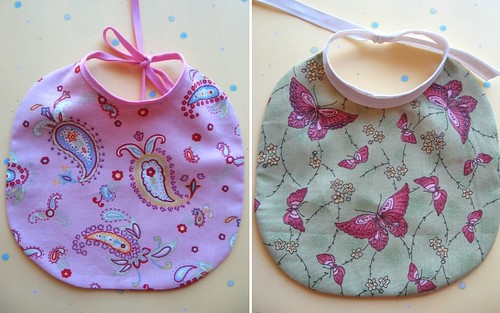
Does any of this make any sense? I’m still getting used to sewing lingo. You can see the difference here. The double-folded bias tape(right) is easer to use, but the single-fold looks nicer and is easier to tie.





Your bibs are so pretty!!
Very nice! I have TONS of single fold bias tape (from grab bags I’ve bought) and never used it. I can really see how it would be easier to tie…thanks for the inspiration to dig some of it out. We have baby fever here too (everyone BUT me) and these look like they would be great gifts.
Such cute bibs! Definitely going to bookmark this and the pattern just in case I need a baby shower gift:)
Cute, cute bibs! And I have several of the fabrics that you’ve used! lol!
Very cute bibs! I like your site!
Really Nice bibs! Just what I was looking for. Thank you!
Pingback: Stoff-Junkie.de » Blog Archive » Neue Links
Pingback: Diane and Fernando » Blog Archive » A weekend of sewing (special thanks to Good Friday)
Thanks so much for this explanation of how to attach the single bias tape. I am very grateful for your effort!
I am also planning to make a home made bibs for my child instead of buying to the store, first it saves my money and second i had fun on doing it.
bias tape doesn´t have to be cut in the curve. Because it´s cut on the bias it´s moving. Just iron it a bit and you´ll see it will easily go into the curve.
But I also like your bibs and the rest of your website.
Great tute! I’ve pinned it and might make some for baby number two due in 2013! As for lingo it’s great. Normally “raw edge” instead of “cut edge” but it’s very clear and an experienced sewist like me is still pinning it with inspiration and anticipation, thank you 🙂
I make my own bias tape and use it somewhat like you did here, not in true bias-tape fashion but more like a trim. It does take 2 rounds of stitching like you show here but I like the results vs. reg. bias tape as it will never pucker or come undone. I’ll do a blogpost on it someday!