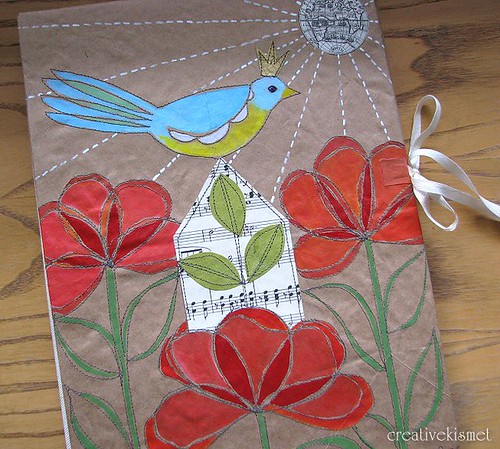
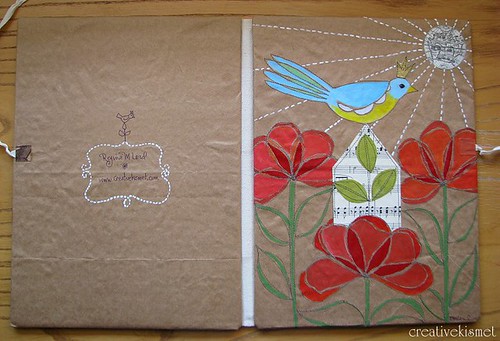
I’ve been asked several times for the instructions for this note keeper, which was published in Green Craft Magazine last January. Since the magazine is probably harder to find now, I thought I’d share my original instructions before they were condensed for the magazine.
I don’t have any how to photos, just images of the finished project, so I hope these instructions make sense and are helpful.
You will need:
Cardboard box cut into Two – 9 1/4” x 12 1/4” pieces
Cereal box for inside pockets
Paper grocery bag for painting and covering cardboard
acrylic craft paint
sewing machine with thread
various decorative papers (maps, music sheets)
One long strip of canvas fabric 12 1/2” x 2 1/2
ribbon
pencil
ruler
scissors
white school glue and glue stick
One legal notepad
1. Cut open a grocery paper bag at the bag’s seams (seams are usually on the back and bottom of the bag). This will give you a large piece of paper to work with. You can iron with steam to make flat or soak in water and hang to dry. Cut two 10” x 13” inch pieces plus two 9” x 12” pieces.
2. Take one of the larger pieces of paper bag, draw an image with pencil and then sew over lines with sewing machine using dark thread. Practice sewing on scrap paper first to get the feel of sewing on paper. Adjust the tension as needed to get nice even stitches.
3. Selectively paint within the sewn lines and glue on other images with glue stick to make an appealing image. When complete and dry, wrap your decorated paper around one cardboard piece using glue to keep everything together. This will be your front cover. Repeat to make back panel, decorating back piece as desired.
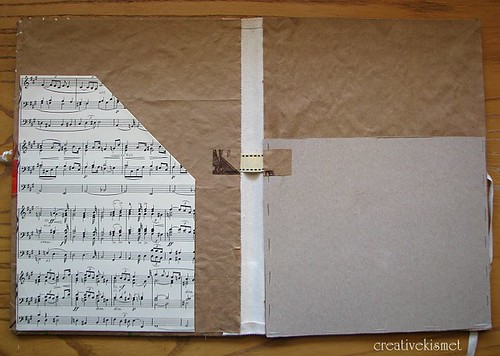
4. Connect front and back panels by gluing canvas cloth strip to each cover piece leaving a 1/2 inch gap between front and back cardboard panels. Line the front and back covers with more grocery bag paper, using the 9 x 12 inch pieces that you’ve already cut, covering the edges of the canvas cloth.
5. Make pockets with cereal box board. Cut a 9 x 7 1/2 inch piece for back pocket and glue in place along the bottom and side edges. This will be where the legal pad will slide in (can also staple this onto lining paper before gluing into place in step 4). Make pocket for inside front panel,cover with decorative paper and glue in place with glue stick. Attach to inside panel by gluing along the left side and bottom edge. This will be where you can keep special papers and notes.
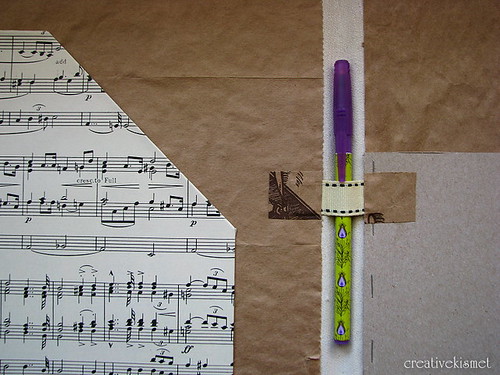
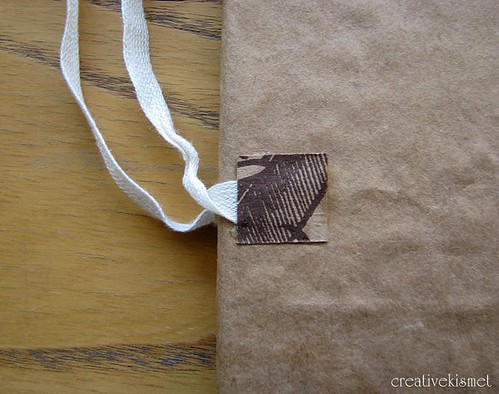
6. Use ribbon pieces to make tie closure, one on the front panel and one on the back. Glue ribbon in place and cover ends with small pieces of paper to secure. Add a pen holder by gluing a small piece of ribbon to the middle area of the open pad keeper. Again, secure the edges with small pieces of paper.
Add in your legal size notepad and a pen and your all set for keeping some notes!
Let me know if you have any questions. 🙂





this is SO up my alley…love green arting! recycle, recycle…things for free are fun! thanks for all your sweet comments on the halloween costume making! xo
This is simply adorable… love it! :]